
Slowly but surely, Microsoft seems to be steering Windows in the direction of Google's Android. First, they released Windows 10 as a free upgrade, mainly because they wanted to cash in on the revenue that they hoped would come when more users had access to the Windows Store. Then, they included tons of tracking "features" to help populate Bing with targeted ads, which has always been Google's primary method for monetizing Android.
- Don't Miss: How to Actually Turn Off OneDrive in Windows 10
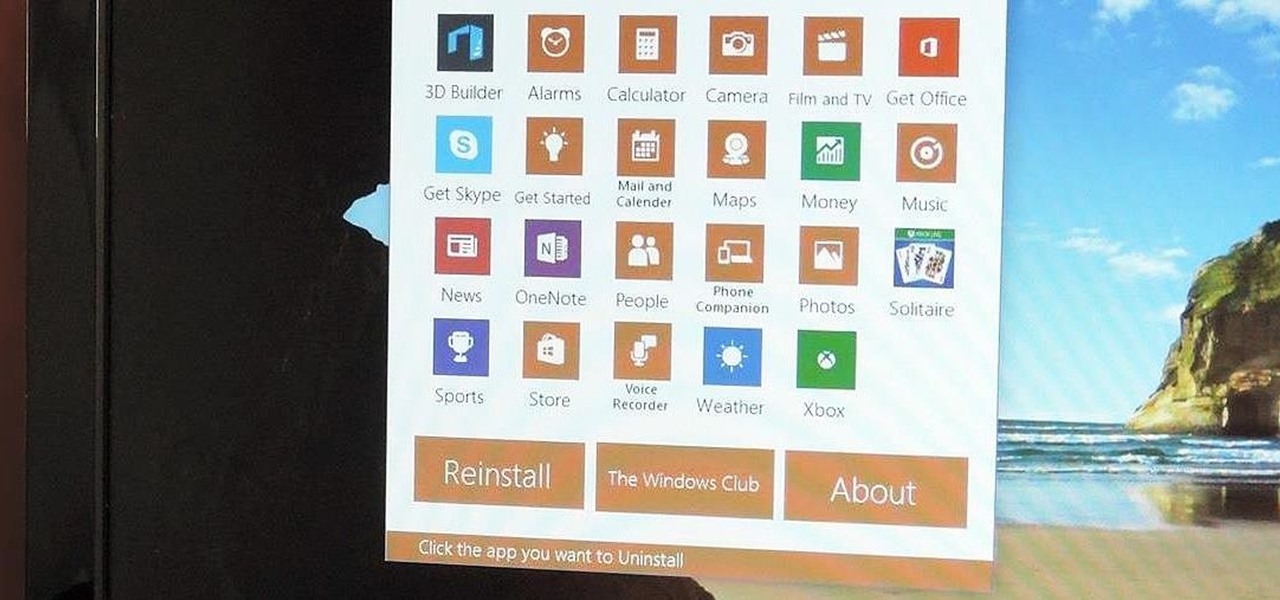
But they took it a step further and even included bloatware apps with Windows 10 that are intended to suck users into additional Microsoft services, and thus, cannot be uninstalled. At least, that was the case until developer Lavish Thakkar came along with a utility that will finally allow us to remove any Windows 10 bloatware apps such as Skype, Xbox, and OneNote—and it can all be done in just a few simple clicks.
Step 1: Download 10AppsManager
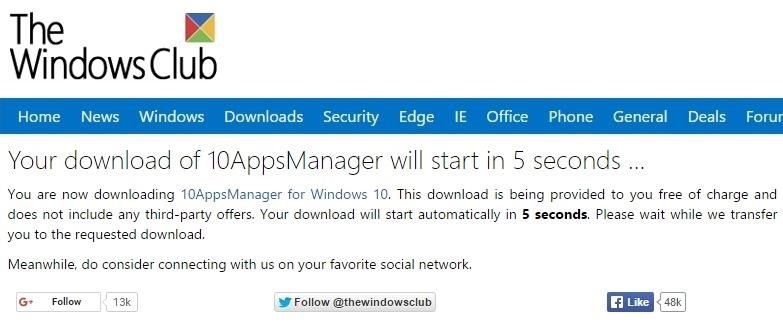
First up, you'll need to grab a copy of Thakkar's bloatware removal tool, which is called 10AppsManager. Head to this link, then the file should automatically begin downloading within 5 seconds.
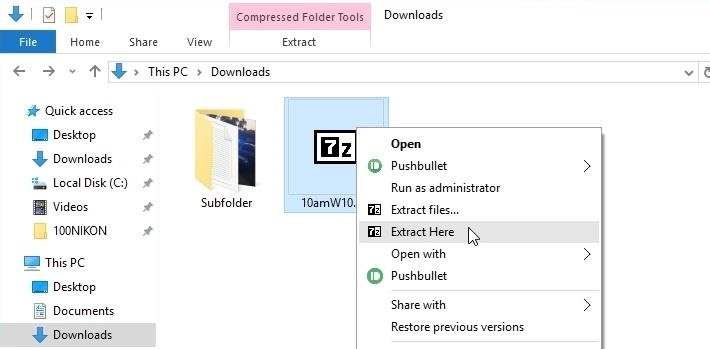
Once it's finished, simply extract the contents of the ZIP, then launch the "10AppsManager.exe" file to get started.
Step 2: Uninstall Bloatware Apps
Before you begin removing Windows 10 bloatware apps, you should know that there is a slight risk involved here. Apps you uninstall with this tool cannot necessarily be reinstalled in all cases, so be careful not to remove anything that you may want to use again in the future. For instance, if you think you might want to record your screen later, you might not want to uninstall the Xbox app.
To be on the safe side, I'd suggest creating a restore point or making a system image backup before you begin.
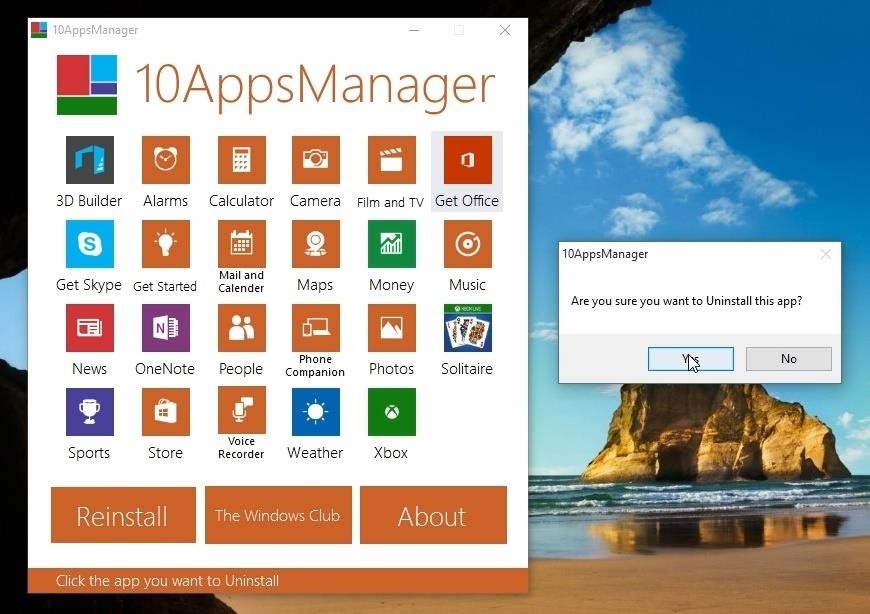
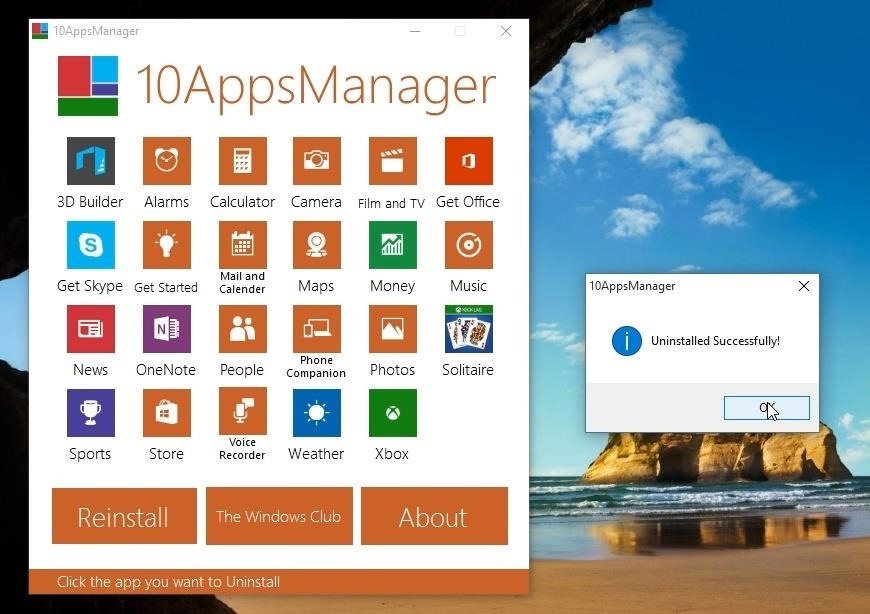
That said, the rest of the process is incredibly easy. If you'd like to uninstall a bloatware app, simply click any app icon from 10AppsManager's main menu, then choose "Yes" when asked to confirm your choice.
From here, just sit back and wait a few seconds while 10AppsManager works its magic. When the bloatware app has been successfully uninstalled, a small window will appear informing you that everything went off without a hitch.
You can repeat this same process to uninstall as many bloatware apps as you'd like—but remember, there's a slight chance you may not be able to reinstall some of these apps, so it's probably best not to get to overzealous.
Step 3: Reinstall Apps (If Necessary)
Should you decide that you'd like to reinstall any of the bloatware apps, know that there is no way to selectively restore any single app, so it's all or nothing. 10AppsManager provides detailed instructions on restoring these apps when you click the "Reinstall" button at the bottom of the main menu, but I'll show you the process here so you can have everything you need in once place.
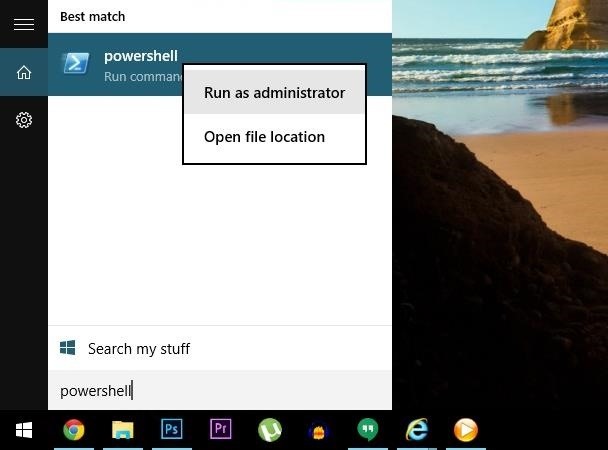
To begin, press the Windows button on your keyboard, then type "powershell" into the Start menu search bar. From here, right-click the "powershell" entry, then choose "Run as administrator."
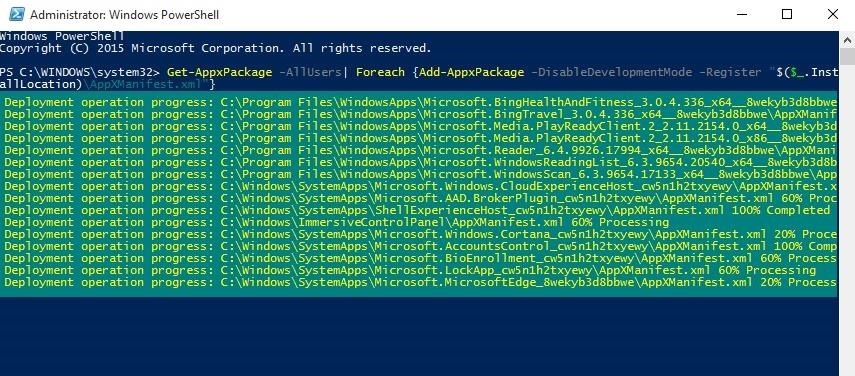
Next, copy and paste the following text into the PowerShell command prompt, then press enter:
When the script finishes running, any bloatware apps that could be restored will now be available to you again.
Which bloatware apps did you disable using 10AppsManager? Let us know in the comment section below, or drop us a line on Facebook, Google+, or Twitter.
Just updated your iPhone? You'll find new emoji, enhanced security, podcast transcripts, Apple Cash virtual numbers, and other useful features. There are even new additions hidden within Safari. Find out what's new and changed on your iPhone with the iOS 17.4 update.


1 Comment
HOW TO DO THI S ON WINDOWS PHONE
Share Your Thoughts