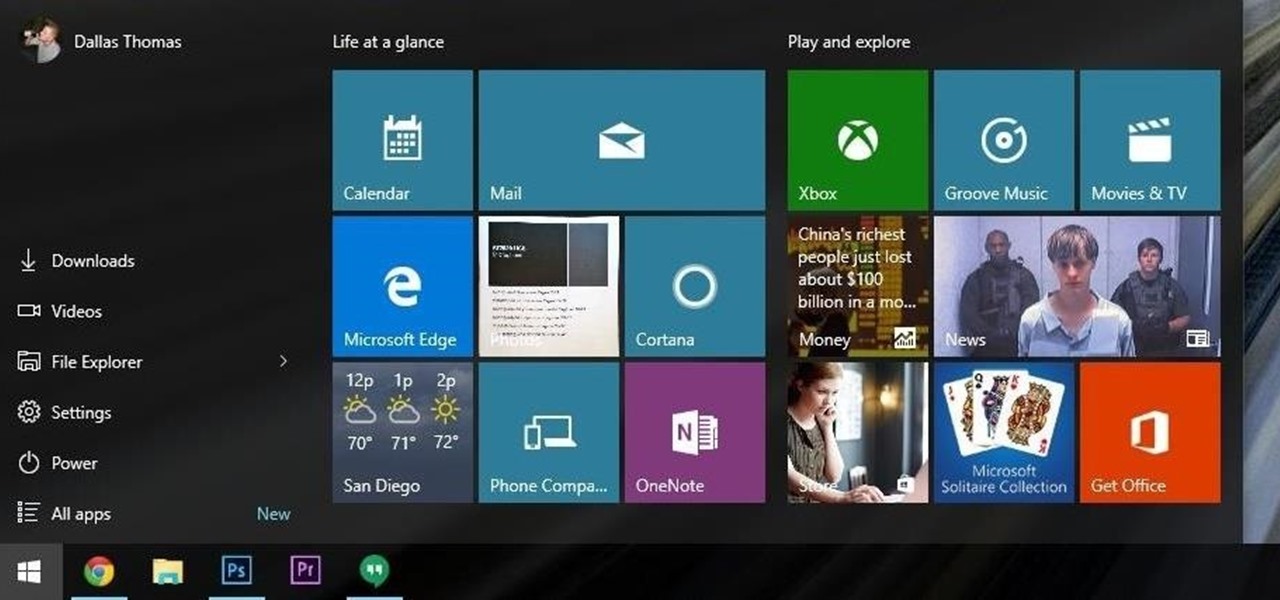

The desktop Start menu is finally back! After receiving a lot of negative user feedback, Microsoft ditched the touchscreen-first approach of Windows 8 and went with a more traditional setup for mouse-and-keyboard users in Windows 10.
But things aren't exactly as they were before. This new Start menu—while seemingly familiar at first glance—packs in a lot of new features and functionality. To help you learn your way around Windows 10's most central menu, I'll go over some of the key features and changes below.
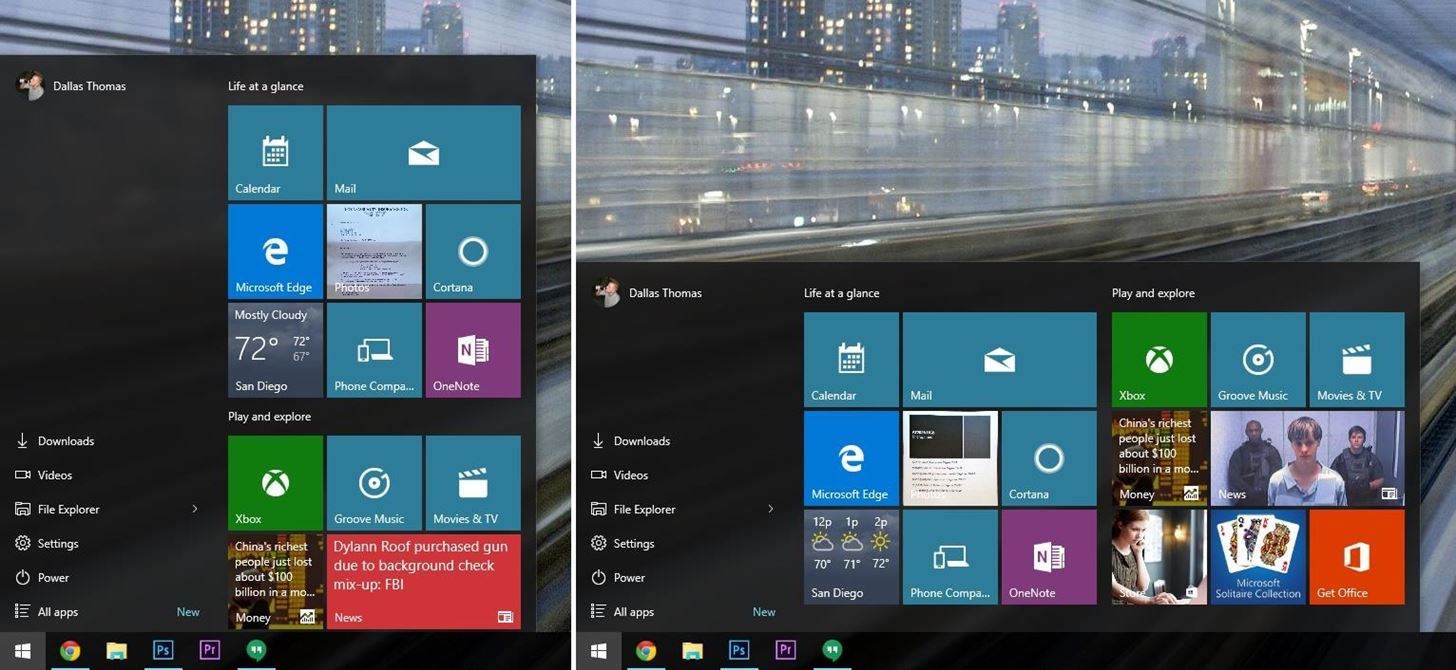
1. The Start Menu Can Now Be Resized
First up, one of the coolest features of the Windows 10 Start menu is that it can easily be resized. If you feel like the default view is too tall and narrow, just use your mouse pointer to drag from any edge of the Start menu, and it will be resized in real time.
2. Live Tiles Offer Quick Information at a Glance
Much like the full-screen Windows 8 Start Screen, native Windows apps can use icons that display at-a-glance information directly on the Windows 10 Start menu. These "Live Tiles," as they're called, update in real time with information such as weather, news, and stock prices.
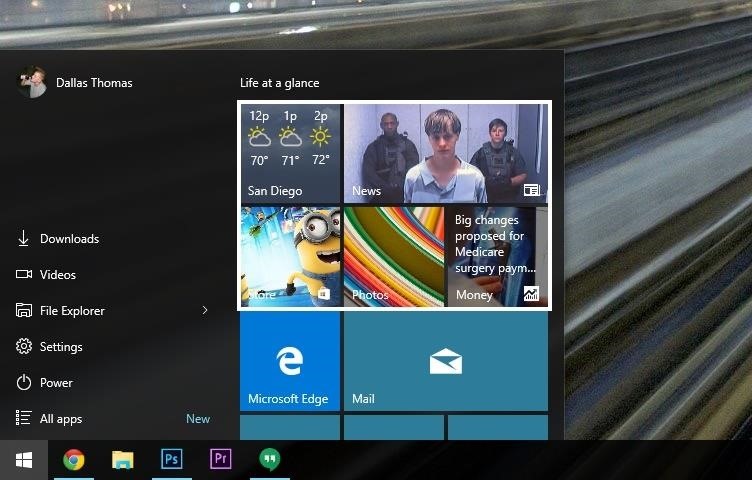
This functionality is generally reserved for apps that were installed through the Windows Store, though Live Tile support from some third-party software developers is beginning to ramp up.
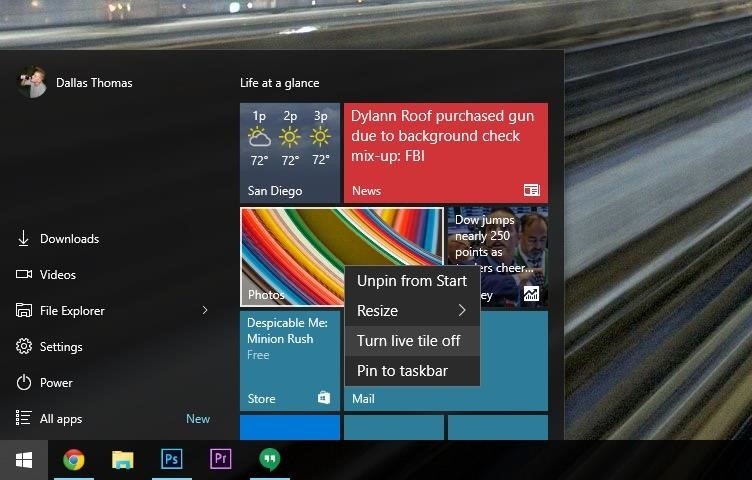
3. Icons Can Be Rearranged, Resized, & Removed
If the Start menu's default layout doesn't quite seem to prioritize the apps and information you deem most important, it's incredibly easy to reorganize. For starters, you can use your mouse to click and hold any icon, then drag it into a spot that works better for you.

As you'll notice, some icons are larger than others—but they don't have to stay that way. If you'd like to resize any icon in your Start menu, just right-click it, then hover over the "Resize" option, and choose between small, medium, wide, or large.
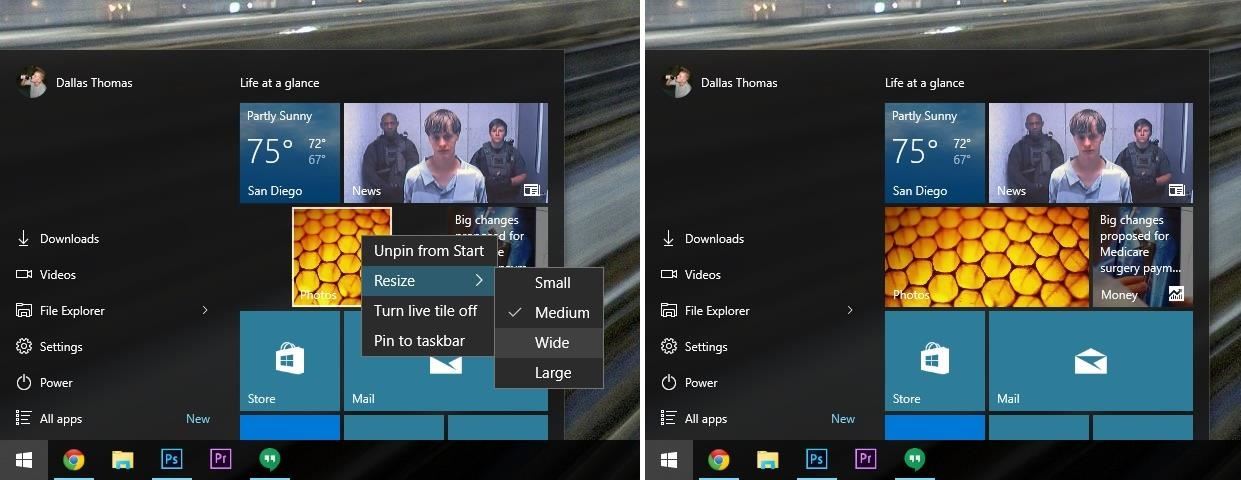
This same right-click menu can be used to turn off the Live Tile feature for any app, or even remove an icon altogether. If you find the Live Tile animations too distracting, just right-click an icon and choose "Turn live tile off." To remove the tile altogether, choose "Unpin from Start" in this same menu.
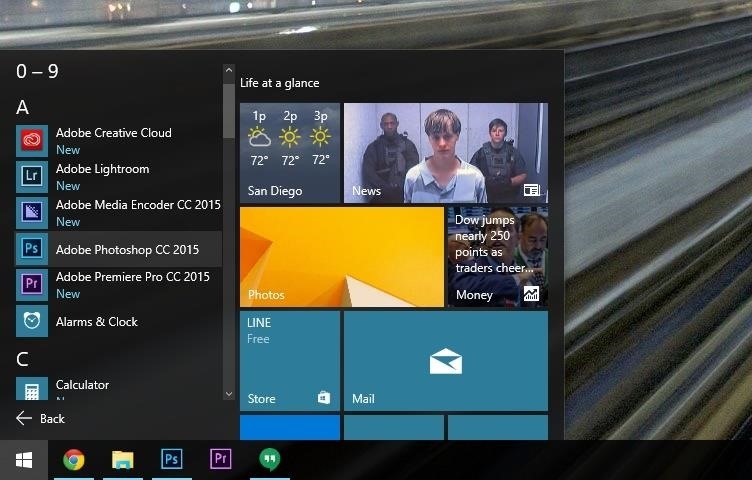
4. Accessing All of Your Apps
The Windows 10 Start menu is more than just a place to put all of your Live Tiles. Much like previous Windows versions, you can access all of your installed apps through the Start menu with a few simple clicks. To begin, just open your Start menu and click the "All Apps" button near the bottom-left corner.

From here, you'll get an alphabetized list of all your installed apps. You can scroll through the list using either your mouse wheel or the scroll bar directly to the right, then launch any app by clicking it once.
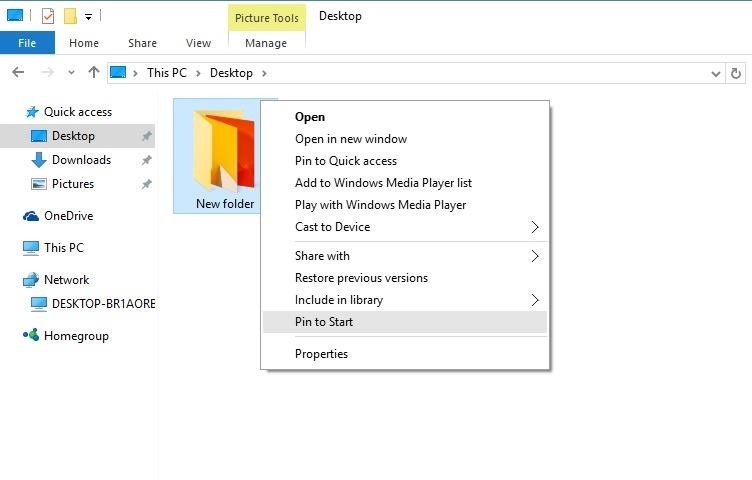
5. Adding Items to the Main Start Menu
If you find yourself using a particular app more than most, consider pinning it to your Start menu for quicker access. From your "All Apps" list, just right-click an app, then select "Pin to Start." From now on, this app will be accessible in the right pane of your Start menu.

Apps aren't the only thing you can pin to the Windows 10 Start Menu—folders and other items can be pinned as well. Using Windows Explorer, just right-click an eligible item, then choose "Pin to Start" for quick access.
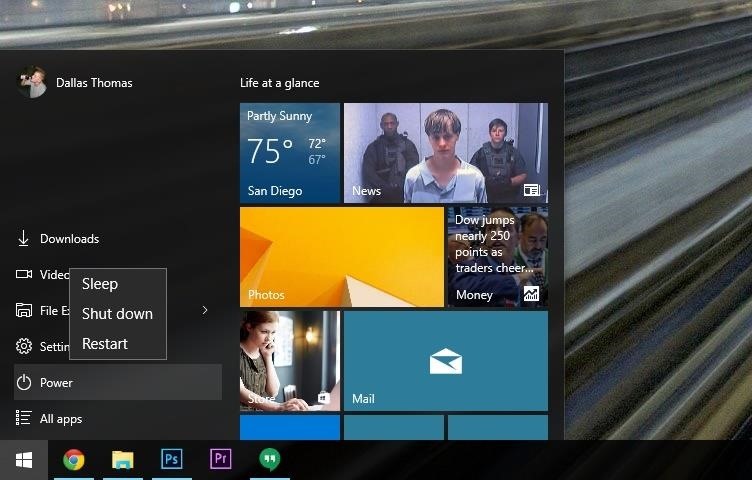
6. Rebooting & Turning Off Your PC from the New Start Menu
In past Windows versions, power options such as "Restart," "Shut Down," and "Sleep" have migrated from the Start menu to Windows 8's funky "Charms" bar, but in Windows 10, these options are right back where they should be. To restart, power off, or hibernate your PC, click the "Power" entry in the Start menu, then choose your preferred option.
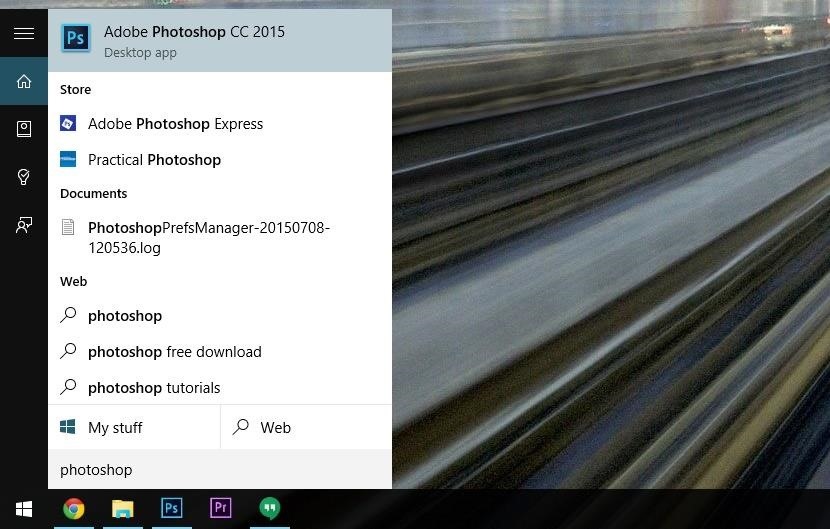
7. Searching from the Start Menu
Windows 10 comes with an awesome new virtual assistant named Cortana that allows you to search your PC and the web using voice commands, but most of these same features can be accessed with a keyboard by way of the Start menu.
To quickly find programs and files, or even perform a web search, just press the Windows key on your keyboard, then type your query as soon as the Start menu comes up (or hit the Windows key + S). Your installed programs will take precedence in this list, so launching an app with your keyboard is as simple as pressing the Windows key, typing the name, then hitting Enter.
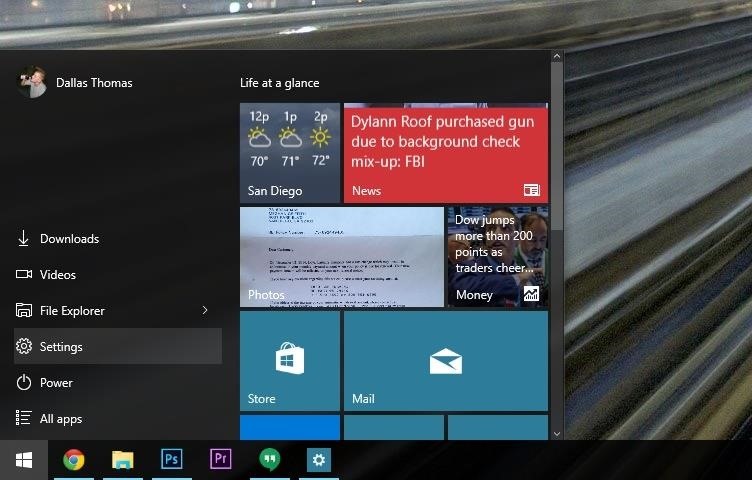
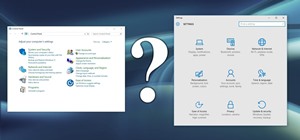
8. Customizing Colors & Other Start Menu Settings
To change the overall appearance of the Windows 10 Start menu, begin by clicking the "Settings" option in the left pane of your Start menu.
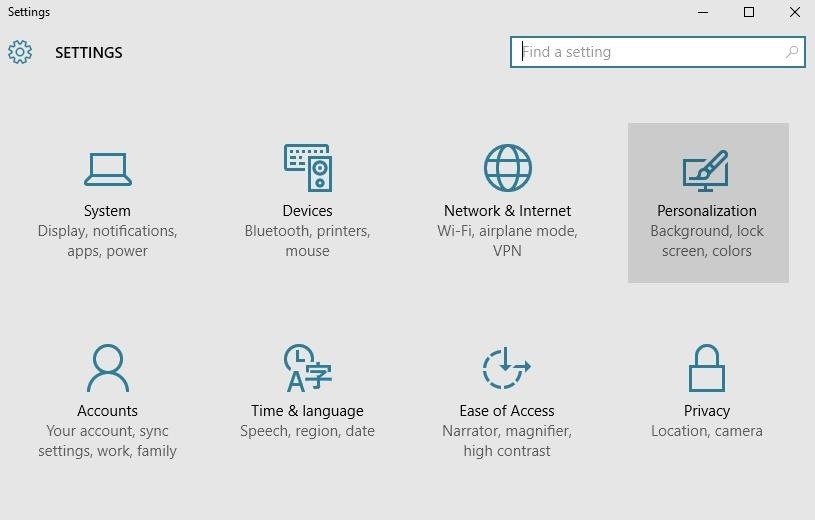
Next up, choose the "Personalization" option from the main Windows 10 Settings menu.
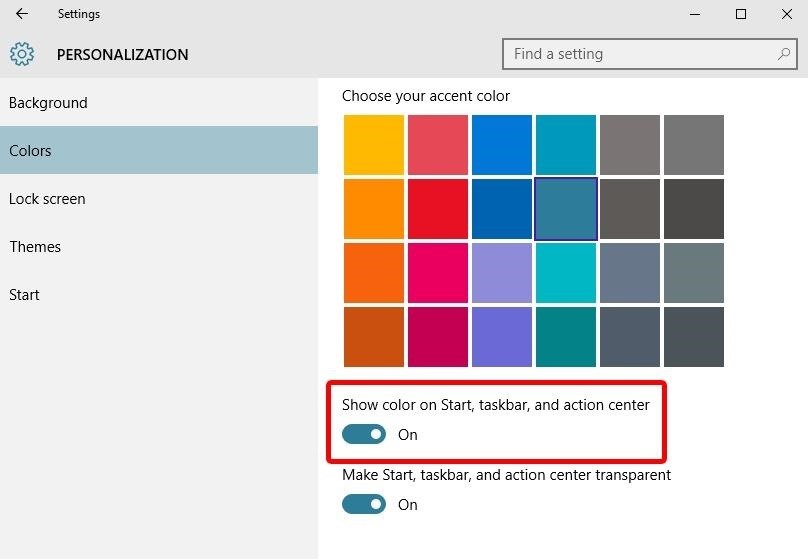
From here, select the "Colors" option if you'd like to change the background color of your Start menu. Next, scroll down a bit and choose your accent color from the list, then make sure to enable the "Show color on Start, taskbar, and action center" option directly underneath.
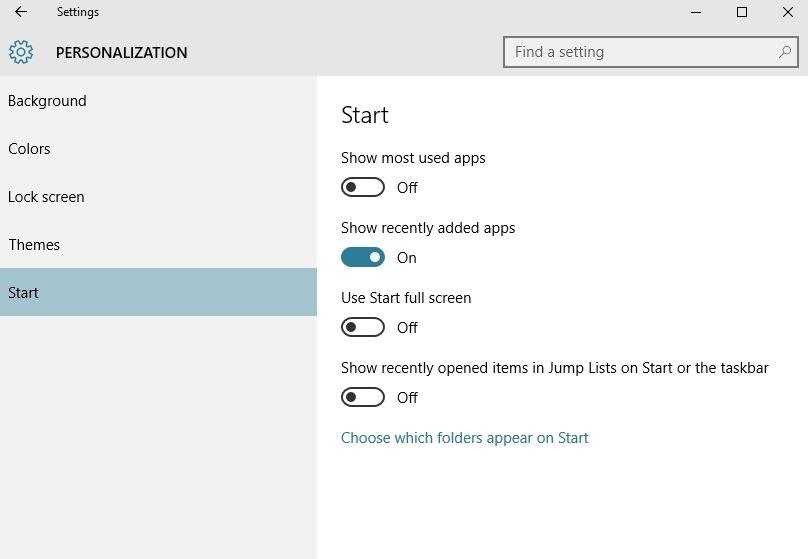
Next up, head to the "Start" tab in the left pane of the Personalization menu to access even more Start menu settings. From here, you can opt to hide the "Most Used" and "Recently Added" app listings in your Start menu, and you can even choose which folders appear in your Start menu, among other options.
Overall, the new Start menu in Windows 10 is a lot more user-friendly than it was in Windows 8, and quite a bit more functional than its Windows 7 counterpart. What are your favorite features of the Windows 10 Start Menu? Let us know in the comment section below, or drop us a line on Facebook, Google+, or Twitter.
Just updated your iPhone? You'll find new emoji, enhanced security, podcast transcripts, Apple Cash virtual numbers, and other useful features. There are even new additions hidden within Safari. Find out what's new and changed on your iPhone with the iOS 17.4 update.


1 Comment
Great tutorial. Thank You.
Now only if I could change the text to be white in the taskbar.
Any comments/suggestions?
Share Your Thoughts